I will share what we accomplished in seven hours on Saturday at Peinture with lots of direction and well thought out planning. Colors were selected, we worked in pairs and steps had to be incrementally layered atop others. All our pieces were waxed and buffed at the end by our own hands as well.
Not anyone’s artistic productions looked the same, even though we all had the same everything, because everyone’s touch is different. That is what makes a handmade item so unique. It is a stamp of your expression via a subconscious road that melds with the wood and the paint and your hands and your brush and your rag and your special touch and perception in this world.
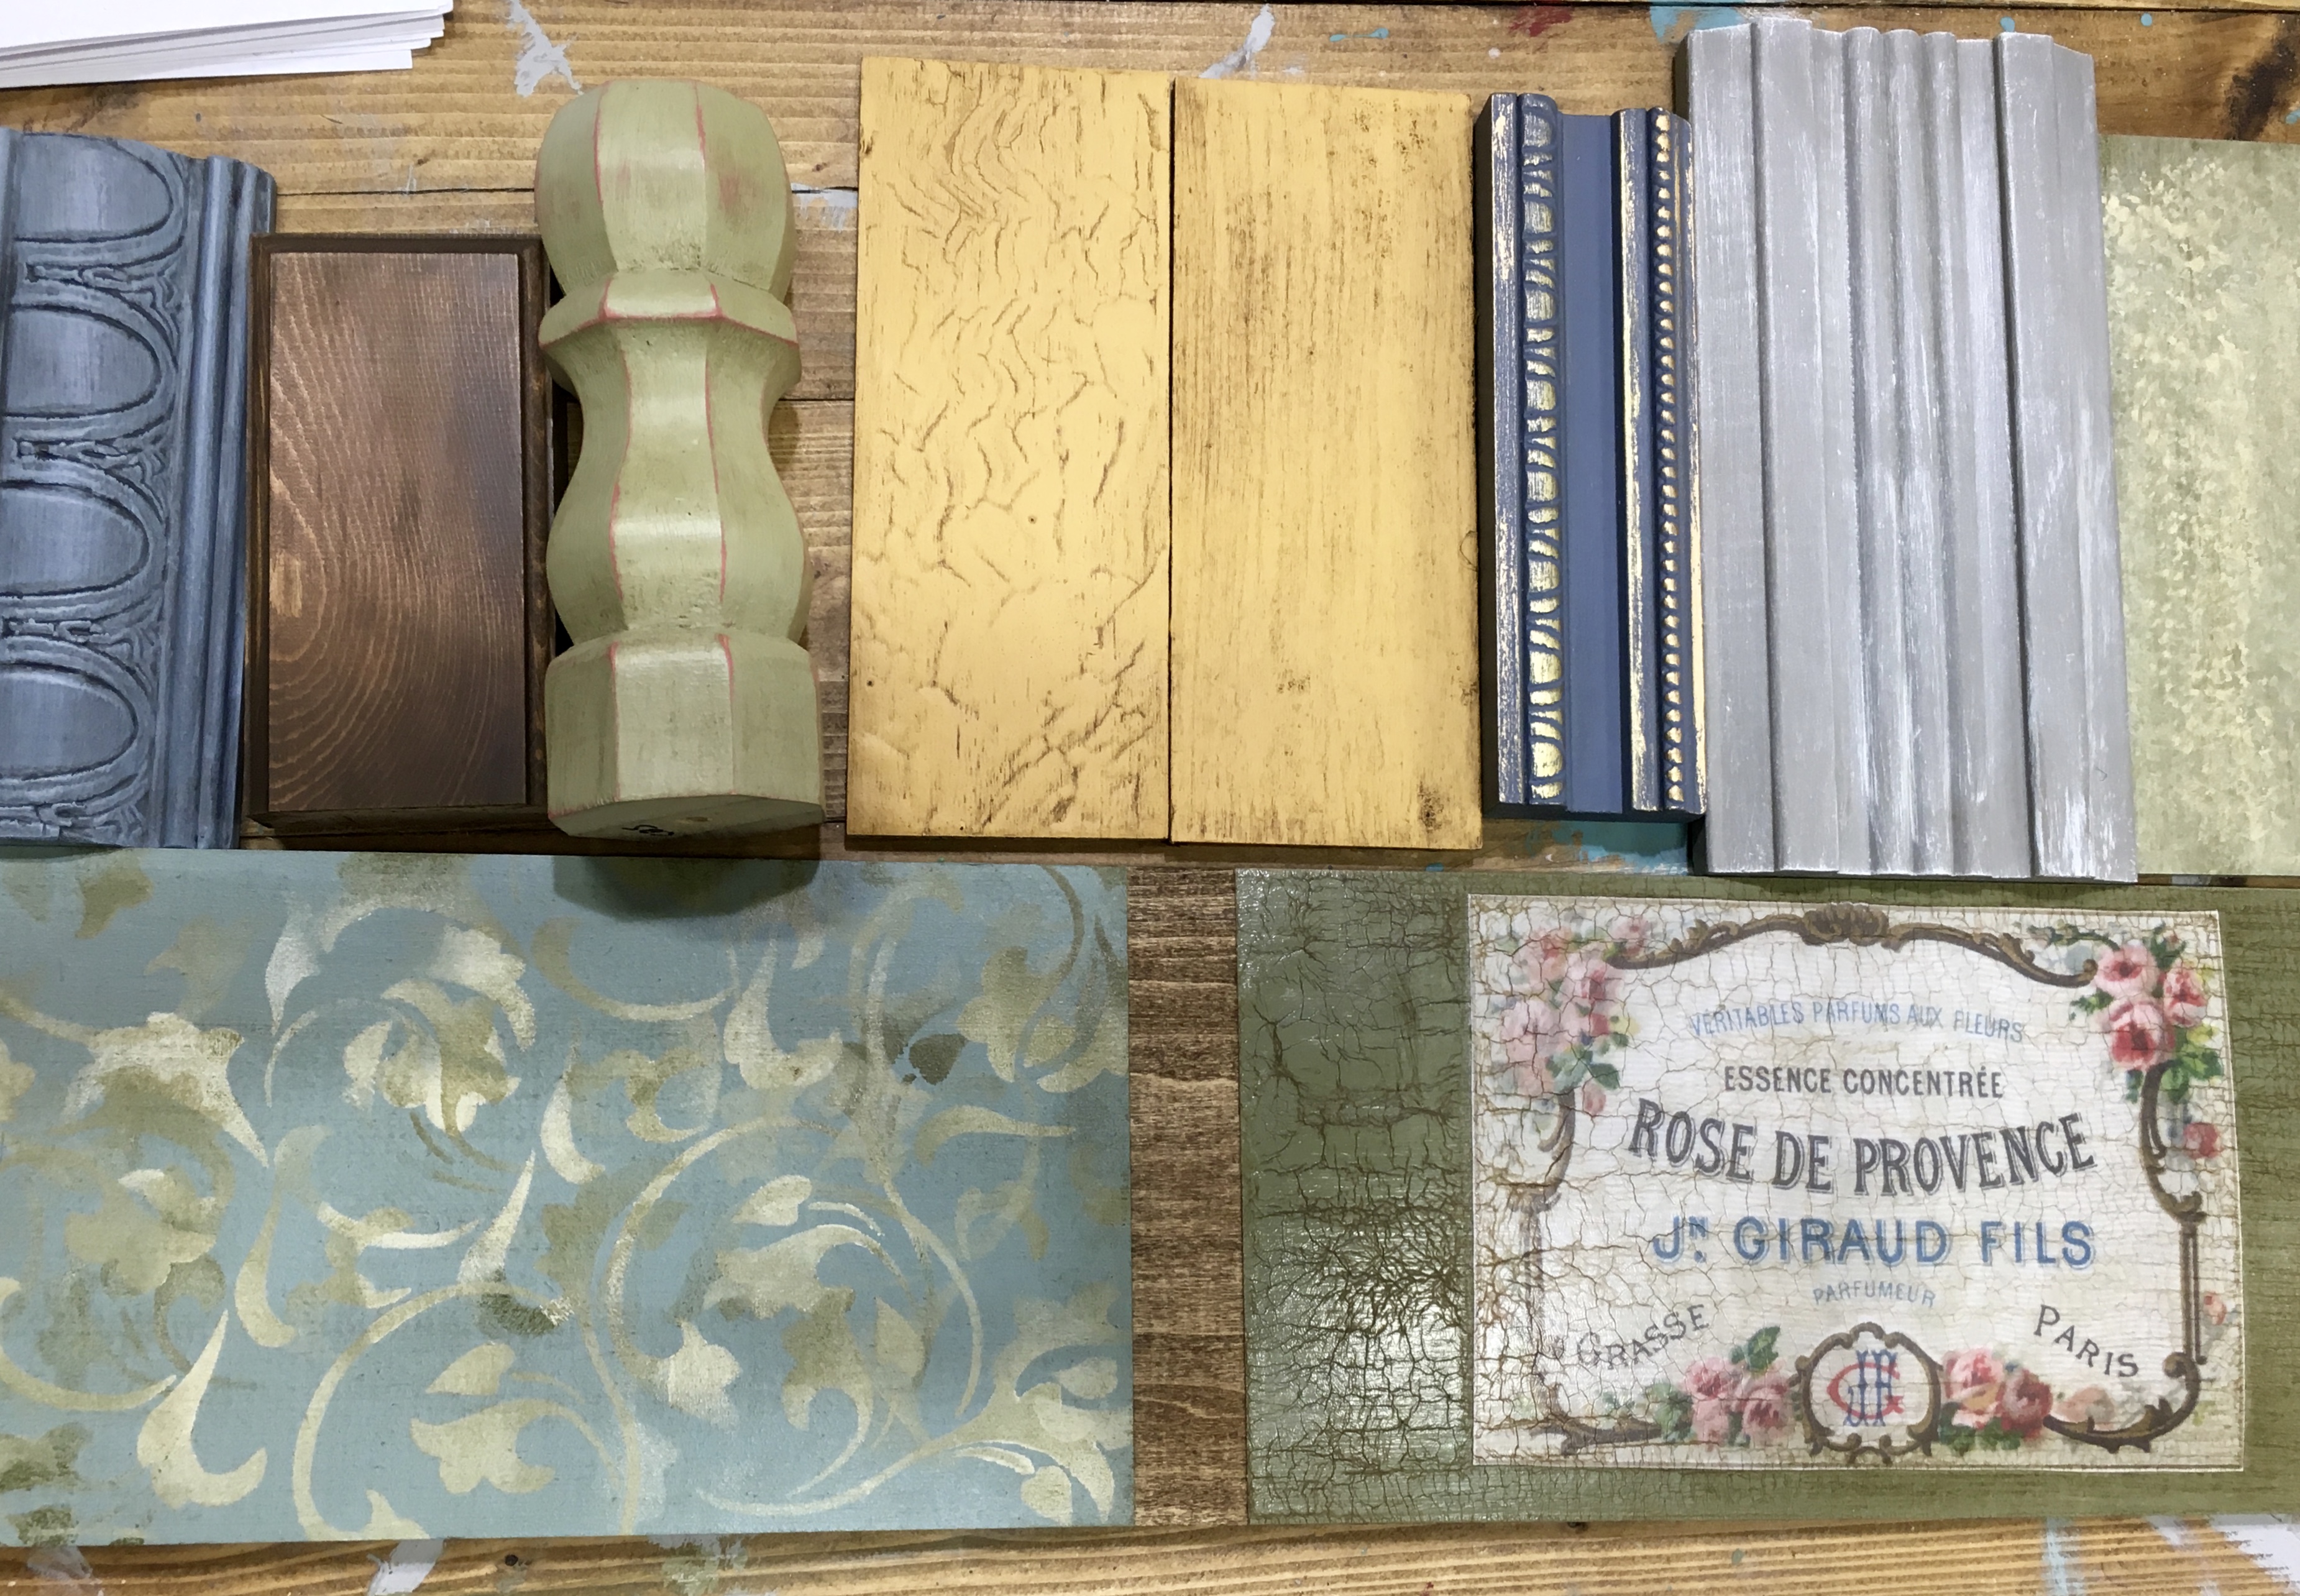
Starting from the top left with the bluish trim piece. Technique learned – Dark color washing using AS Louis Blue and dark wax.
The brown wood is stained with a mixture of AS paints to create an expresso finish on raw wood. We then added more depth with dark wax. Techniques learned – Mixing colors and recipes and staining.
The chair leg was first painted in AS Scandinavian Pink then after drying, we added a layer of AS Versailles. Techniques learned – Two color distressing and before waxing and after waxing distressing and different tools used. We did the top in “before” and bottom in “after” then waxed it all up at the end of class.
The yellow slats look and feel like barn wood. We used AS ochre and Technique learned – Rustic Matte Crackling. I got to try two because supposedly I messed up the first one ( see how it is wavy? – it’s supposed to be straight and like raked with ridges). I learn best when I make a mistake.
The dark blue trim is AS Old Violet (MY ABSOLUTE FAVORITE COLOR IN THE SERIES) technique learned – Gilded waxing. I used brass, old gold and King’s gold. Probably my favorite thing to do EVER!!! Can anyone say “Bling?”
The wide grey floor base moulding is done in AS Paris Grey (one of AS’s first colors and just beautiful) with AS pure white which has no pigment really. Technique learned – Dry brushing. We also learned to make it look like linen fabric with a weaved look but I decided not to (that looks better on a flat piece anyway). I liked that my practice section simulated driftwood.
The next technique and top right plank that looks like snakeskin but was supposed to look like old wood painted over and over over time, is my version of Frottage, an Old World technique, using three different colors and lots of manipulation with different papers.
Bottom left is also one of my favorites, a textured stencil technique using AS Duck Egg Blue as a base and AS Olive and Cream for the stencil. Then we dark waxed it so it look aged. Loving this look.
In between the stenciled side and the decoupaged side, we taped it and then at the end of class just peeled off the tape and dark waxed the raw wood so we learned the technique of how to tape off and what to do so not to bleed the paints plus what dark wax looks like on just plain raw wood.
And last but not least, one of the longer processes and techniques, the craqueleur over decoupage and then antiquing it. This was a standout piece and involved but loved it. We used AS Chateau Grey as our base at the beginning of class, we decoupaged and learned the correct way of cutting, etc. as soon as the paint was dry and we had moved on to other pieces, then we did step one of the craqueleuring before lunch and let it dry. Right before the day was done, we added step two and dark waxed.
I’m exhausted just explaining this class.